Organize Messy Photos with an Image Management Tool
When your PC photo library explodes in size, manual folders stop working. You remember the scene, not the filename. An image management tool turns photos into searchable assets, so you can group, filter, and archive without guessing where anything lives.
This guide shares a repeatable, local-first workflow for messy photo libraries: index the right scope, search by image, converge results fast, and archive the best versions. It is designed for privacy-sensitive collections, multi-drive setups, and long-term reuse of personal and work photos.
Why messy PC photo libraries keep getting worse
Most chaotic photo libraries show the same patterns:
- Filenames carry no meaning:
IMG_2301andScreenshot-2026-01-30are not searchable memories. - Folders drift constantly: projects rename, drives move, and backup merges duplicate paths.
- Too many versions: crops, exports, and edits pile up without a clear “best” copy.
- Screenshots dilute the library: important text is trapped in images you cannot search.
The hidden cost is time. When you cannot find the right photo quickly, you re-edit or re-export, creating even more versions. The solution is to make photos searchable by their visual content instead of their filenames.
Image management tool workflow: index → search → refine → archive
The fastest way to clean a messy library is to follow the same loop every time. This workflow keeps results focused and gives you a clean archive you can reuse later.
Step 1: index only the folders you truly use
Start with 1–3 high-frequency folders (family albums, active project assets, or screenshot libraries). Avoid indexing every drive at once. A focused index produces cleaner search results and faster decisions. For setup details, see the first-time setup guide.
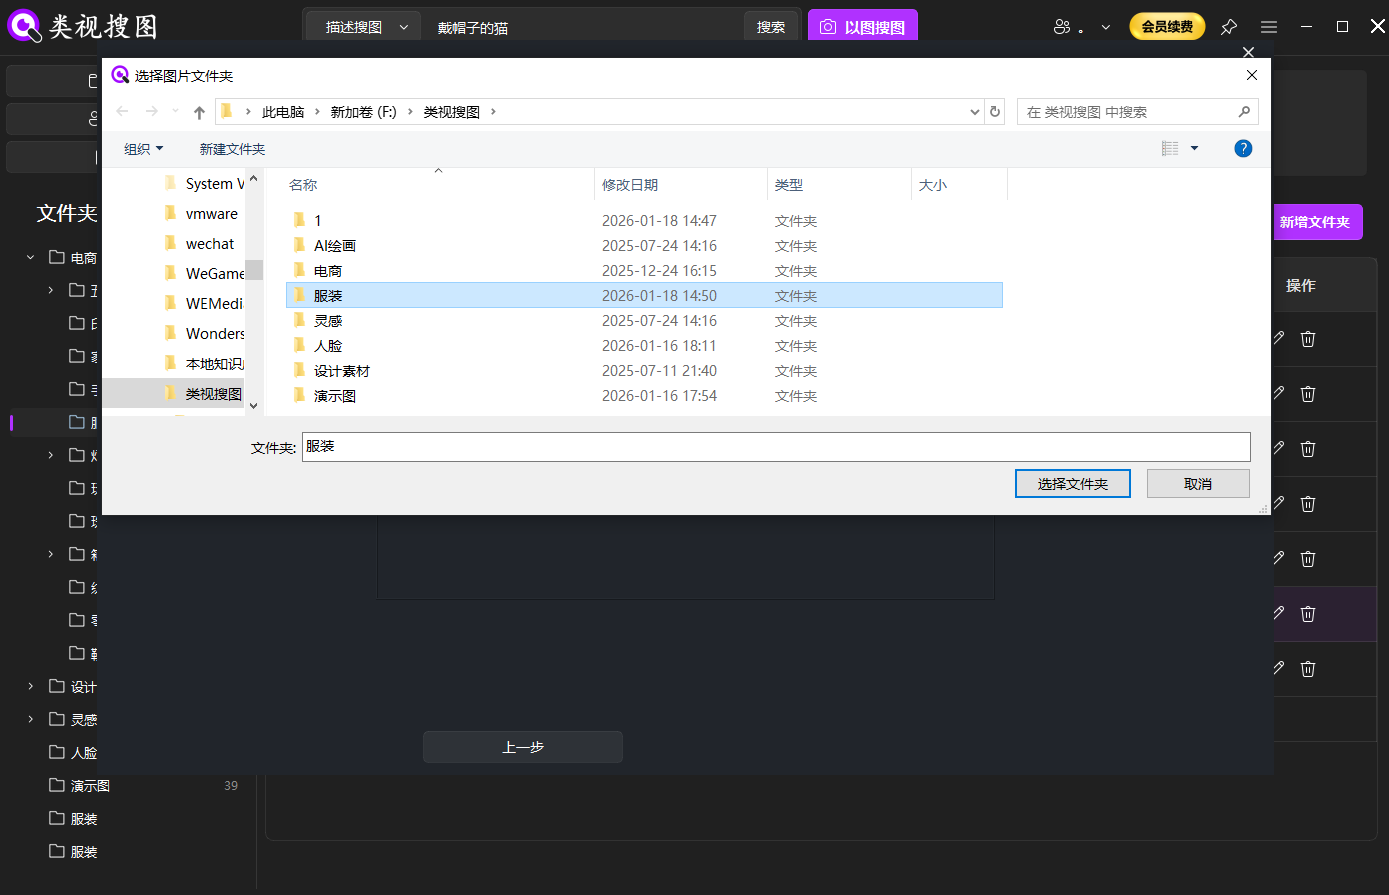 Caption: Index only your most-used folders so the image management tool returns focused, high-signal results.
Step 2: search by a strong reference photo
Pick a clear photo with a visible subject and minimal overlays. Start with a higher similarity threshold to lock the core cluster, then relax the threshold to capture lighting or angle variations.
If you manage screenshot-heavy folders, choose a screenshot with clean text and pair visual search with OCR queries later to get precision.
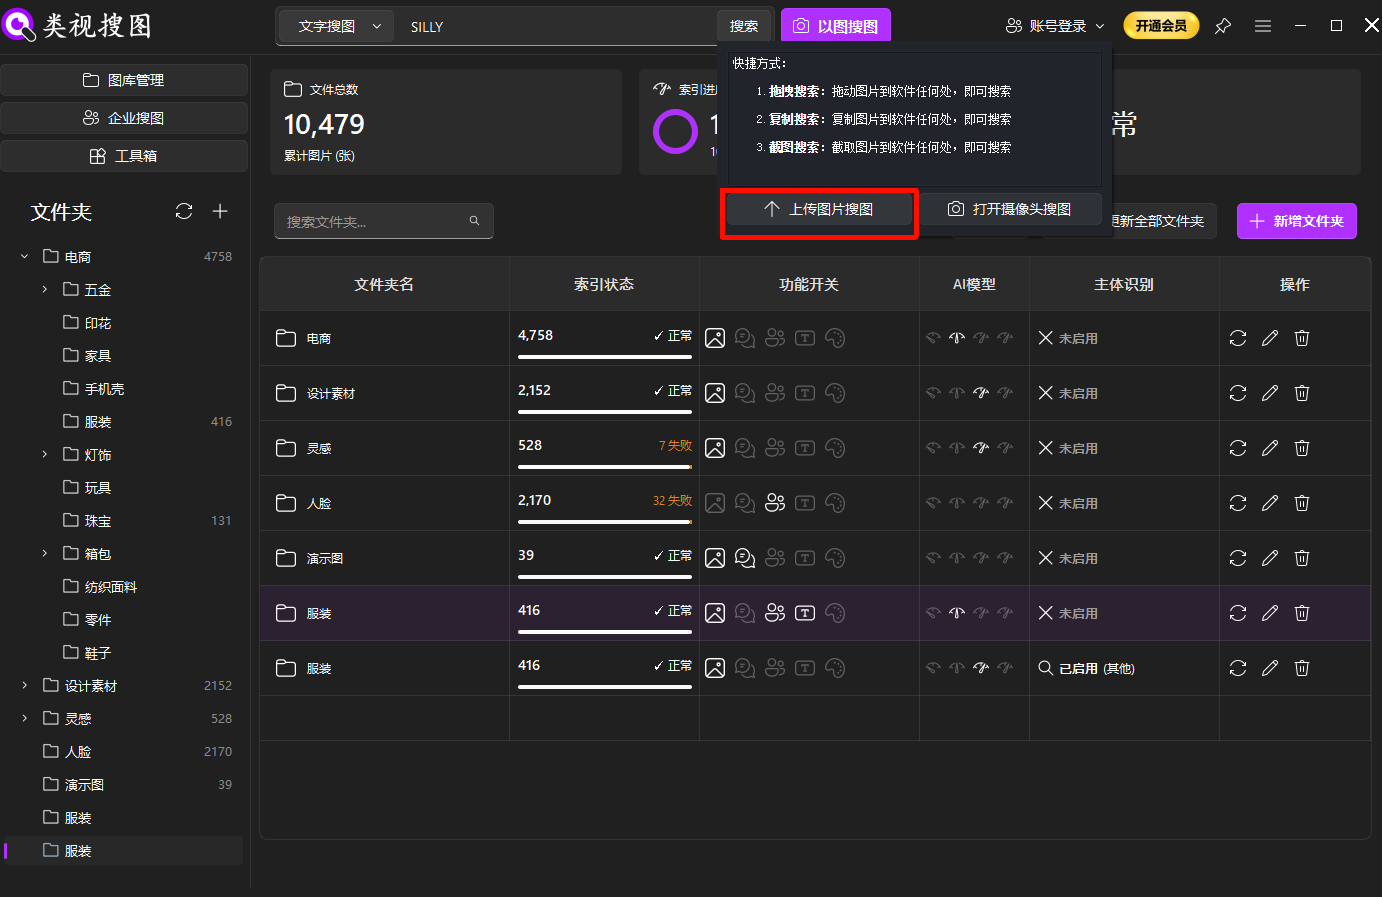 Caption: A clean reference photo helps the image management tool gather the right scene cluster fast.
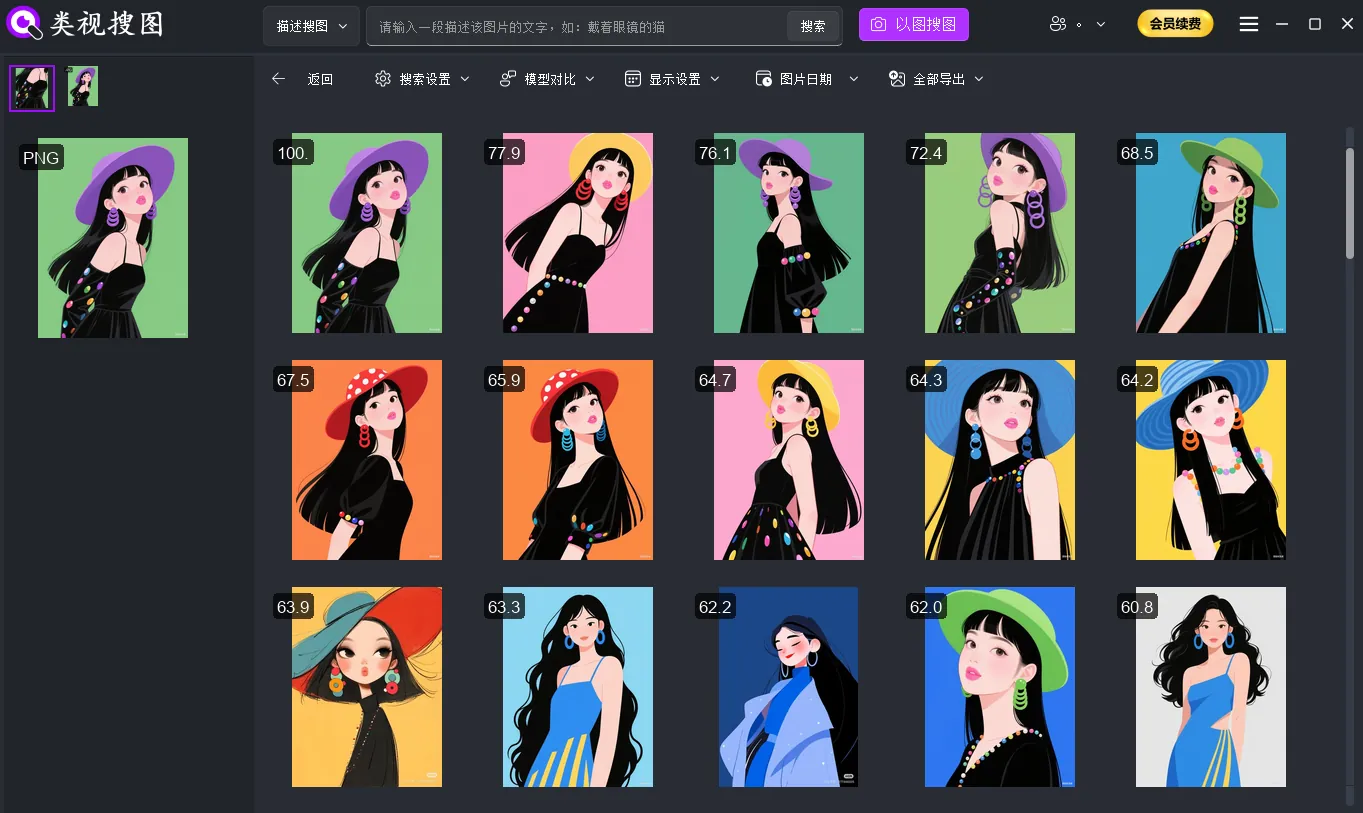
Step 3: refine with similarity + folder filters
When the result set is large, tighten similarity first, then filter by folder scope, and only then broaden the threshold. This order prevents you from being overwhelmed and keeps decisions fast. Use the browsing and filtering guide for detailed tips.
Recommended convergence order:
- Raise similarity to lock the closest group
- Filter by folder or project scope
- Lower similarity to include small variations
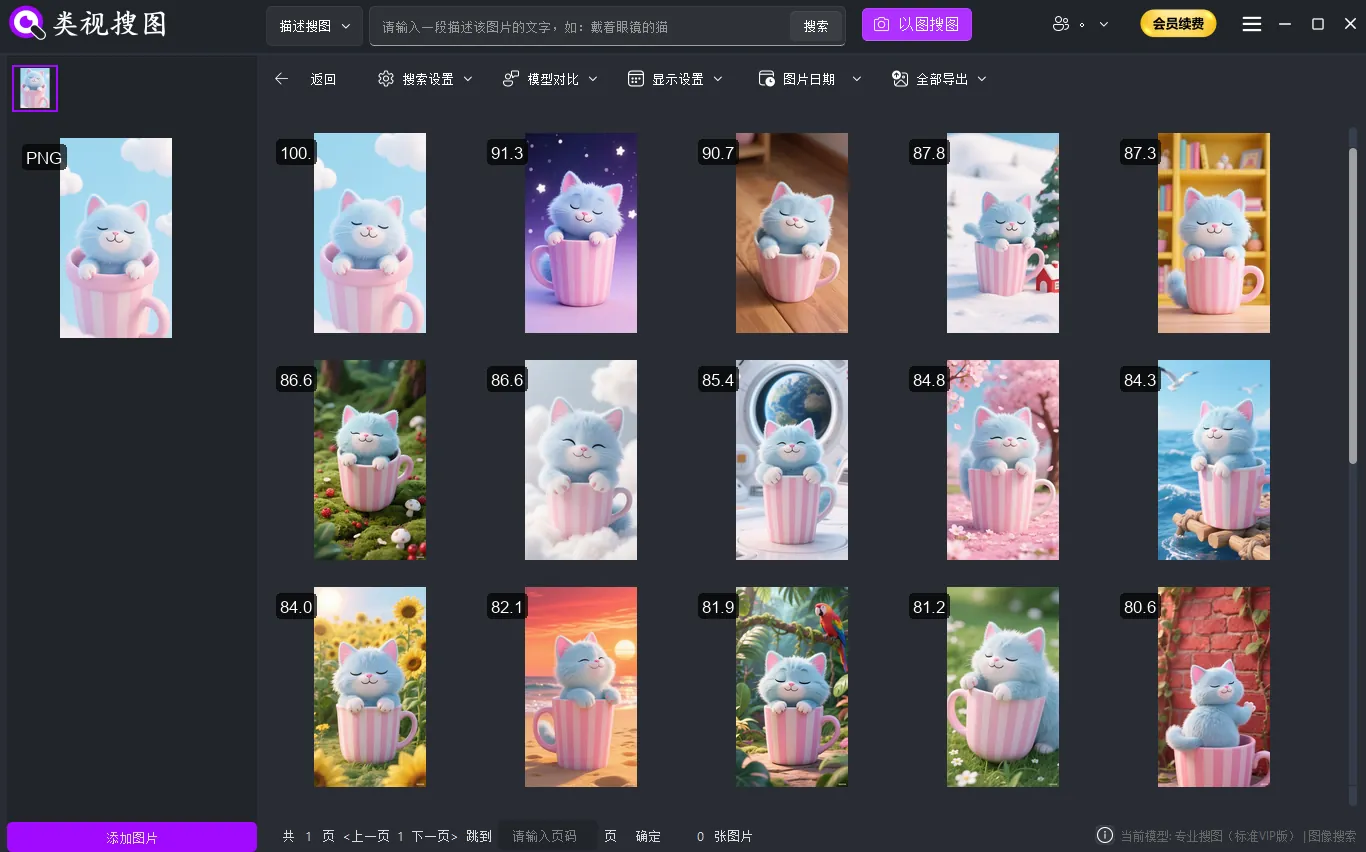 Caption: Converge results with similarity and folder filters, then open the source folder to act on real files.
Step 4: open the source folder and archive selects
Never stop at “found.” Open the source folder, pick the best 1–3 versions, and move them into a “Selects” or “Project” library. That archive is what makes the next search faster and cleaner.
If you are unsure about deletion, move extra versions to a “To-Review” folder for 30 days before removing them.
Build a classification structure that stays usable
You do not need a complex taxonomy. A lightweight structure that stays consistent is enough:
- Timeline folders for personal memories (e.g.,
2026/Trips/,2026/Family/) - Topic libraries for work assets (e.g.,
Assets/Client-A/,Assets/Product Shots/) - Selects library for the best reusable versions only
- Screenshot library for text-heavy captures that benefit from OCR searches
Naming should be short and stable. A pattern like 2026-01-Client-A-v2 keeps folder filtering predictable across drives.
If you want a deeper workflow for clustering similar photos, see the same-scene photo culling guide.
 Caption: Use grouped results to pick the best versions and keep the selects library clean.
Maintenance checklist and common mistakes
A clean library depends on short, repeatable maintenance rather than one massive cleanup.
Weekly routine (10 minutes):
- Move new keepers into the selects library
- Remove obvious duplicates or low-quality versions
- Sync indexing after imports so new photos are searchable
Monthly routine:
- Archive inactive projects to a read-only folder
- Review “To-Review” folders and clear confirmed duplicates
- Align folder names so filters stay consistent
Common mistakes to avoid:
- Indexing everything on day one, which floods results with noise
- Searching without archiving, so the library never improves
- Renaming top-level folders every week, breaking the index
- Ignoring duplicates, which keeps results cluttered
If results look wrong (too many or too few), check the FAQ troubleshooting list.
Summary and next step
Organizing messy photos is not about willpower. It is about a consistent loop: index a clean scope, search by image, refine with similarity and folder filters, then archive the best versions. With an image management tool, your photo library becomes a searchable asset you can trust.
Next step:
- Index one high-frequency folder
- Run three reference-photo searches
- Archive the best versions into a selects library
Ready to start? Download here: /download.